What is the Purpose of the Abrasion Resistance Test?
August 11, 2023
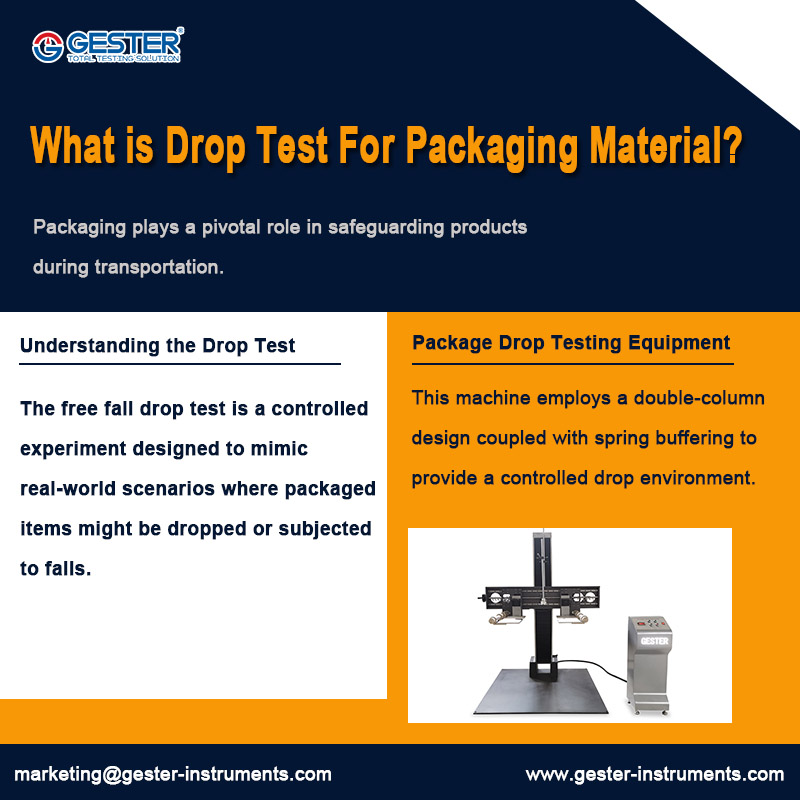
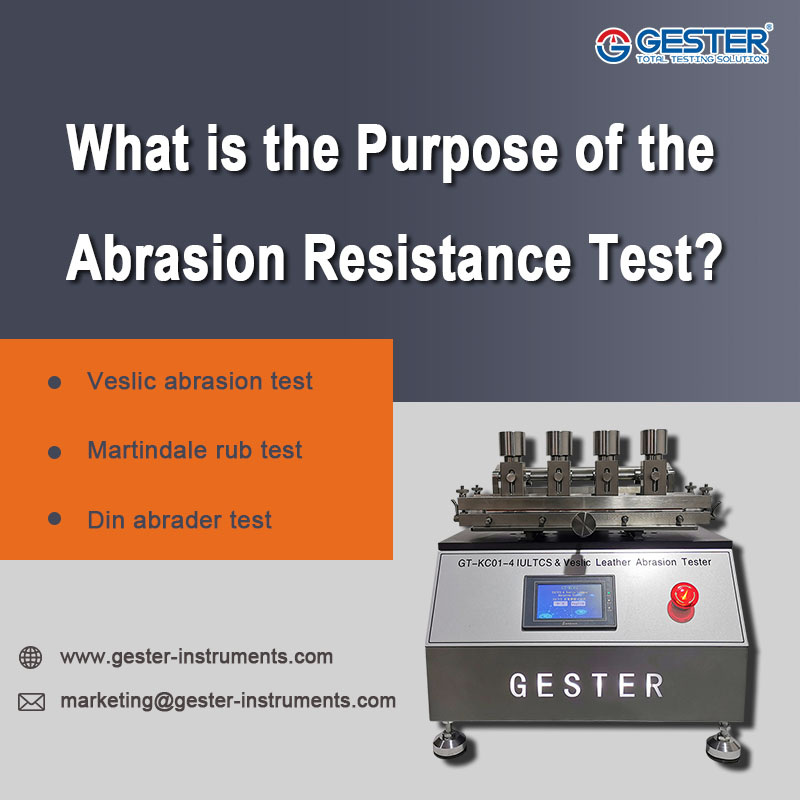
What is the Purpose of the Abrasion Resistance Test? Introduction In the realm of materials testing, the abrasion resistance test stands as a sentinel of durability. This article delves into the very heart of this test's purpose, unraveling its essential role in evaluating the resilience of various materials against the wear and tear. Understanding Abrasion Resistance At its core, the abrasion resistance test is a meticulous examination of how well a material can withstand the abrasive forces it encounters during its lifecycle. Whether it's fabrics, metals, plastics, or coatings, this test is a revealing window into a material's capacity to endure the erosive impacts of friction. 1. Preserving Product Quality The crux of the matter lies in preserving product integrity. Materials used in various industries, be it automotive, textiles, or construction, must endure a barrage of wear from constant usage. The abrasion resistance test serves as a litmus test, ensuring that the material's quality doesn't degrade prematurely, guaranteeing longevity and customer satisfaction. 2. Informing Material Selection In the grand tapestry of design, choosing the right material can make or break a product. The abrasion resistance test plays the role of an advisor, whispering insights into whether a material is apt for its intended application. Manufacturers armed with this knowledge can make informed decisions, crafting products with materials that stand the test of time. 3. Enhancing Performance The abrasion resistance test is a compass for engineers and designers, pointing toward materials that excel under duress. It enables them to create products that not only perform their duty but do so magnificently, even in the face of adversity. The Test in Action 1. Leather abrasion test This IULTCS & Veslic Leather Abrasion Tester is used for color fastness testing of leather, plastic and textile. Under the specified pressure, let white wool felt to do reciprocating abrasion to the surface of dye sample. After a specified count, to assess the color fastness of sample by checking the color change and fading of sample and the discoloration of white wool felt. Rubbing Fastness Tester can be used for dry abrasion testing and wet abrasion test. 2. Martindale rub test The martindale abrasion and pilling tester is used to determine the abrasion and pilling resistance of all kinds of textile structures. Samples are rubbed against known abrade at low pressures and in continuously changing directions and the amount of abrasion or pilling is compared against standard parameters. 3. Din abrader test DIN Abrasion tester GT-KB03 is used to determine wear performance test of materials like elastic material, rubber, tires, conveyor belts, conveyor belts, shoe soles. Conclusion The abrasion resistance test safeguards product quality, empowers informed material choices, and uplifts performance benchmarks. As industries evolve and innovations abound, this test remains a steadfast guardi...
View More


 English